ChatGPT 配置方法
总的来说,分为三步:
- 先找到一个合适的工具,下面一节有提供一些工具的配置示例。(本站提供 API 服务,可以理解为数据源,Key 可以理解为钥匙,有了钥匙才能获取数据,获取了数据还需要工具来解析并显示这些数据,工具可以是网页、App、小程序、浏览器插件等等, 如果你只是轻度使用的话,这里有个配置好的聊天窗口,可以直接使用。)
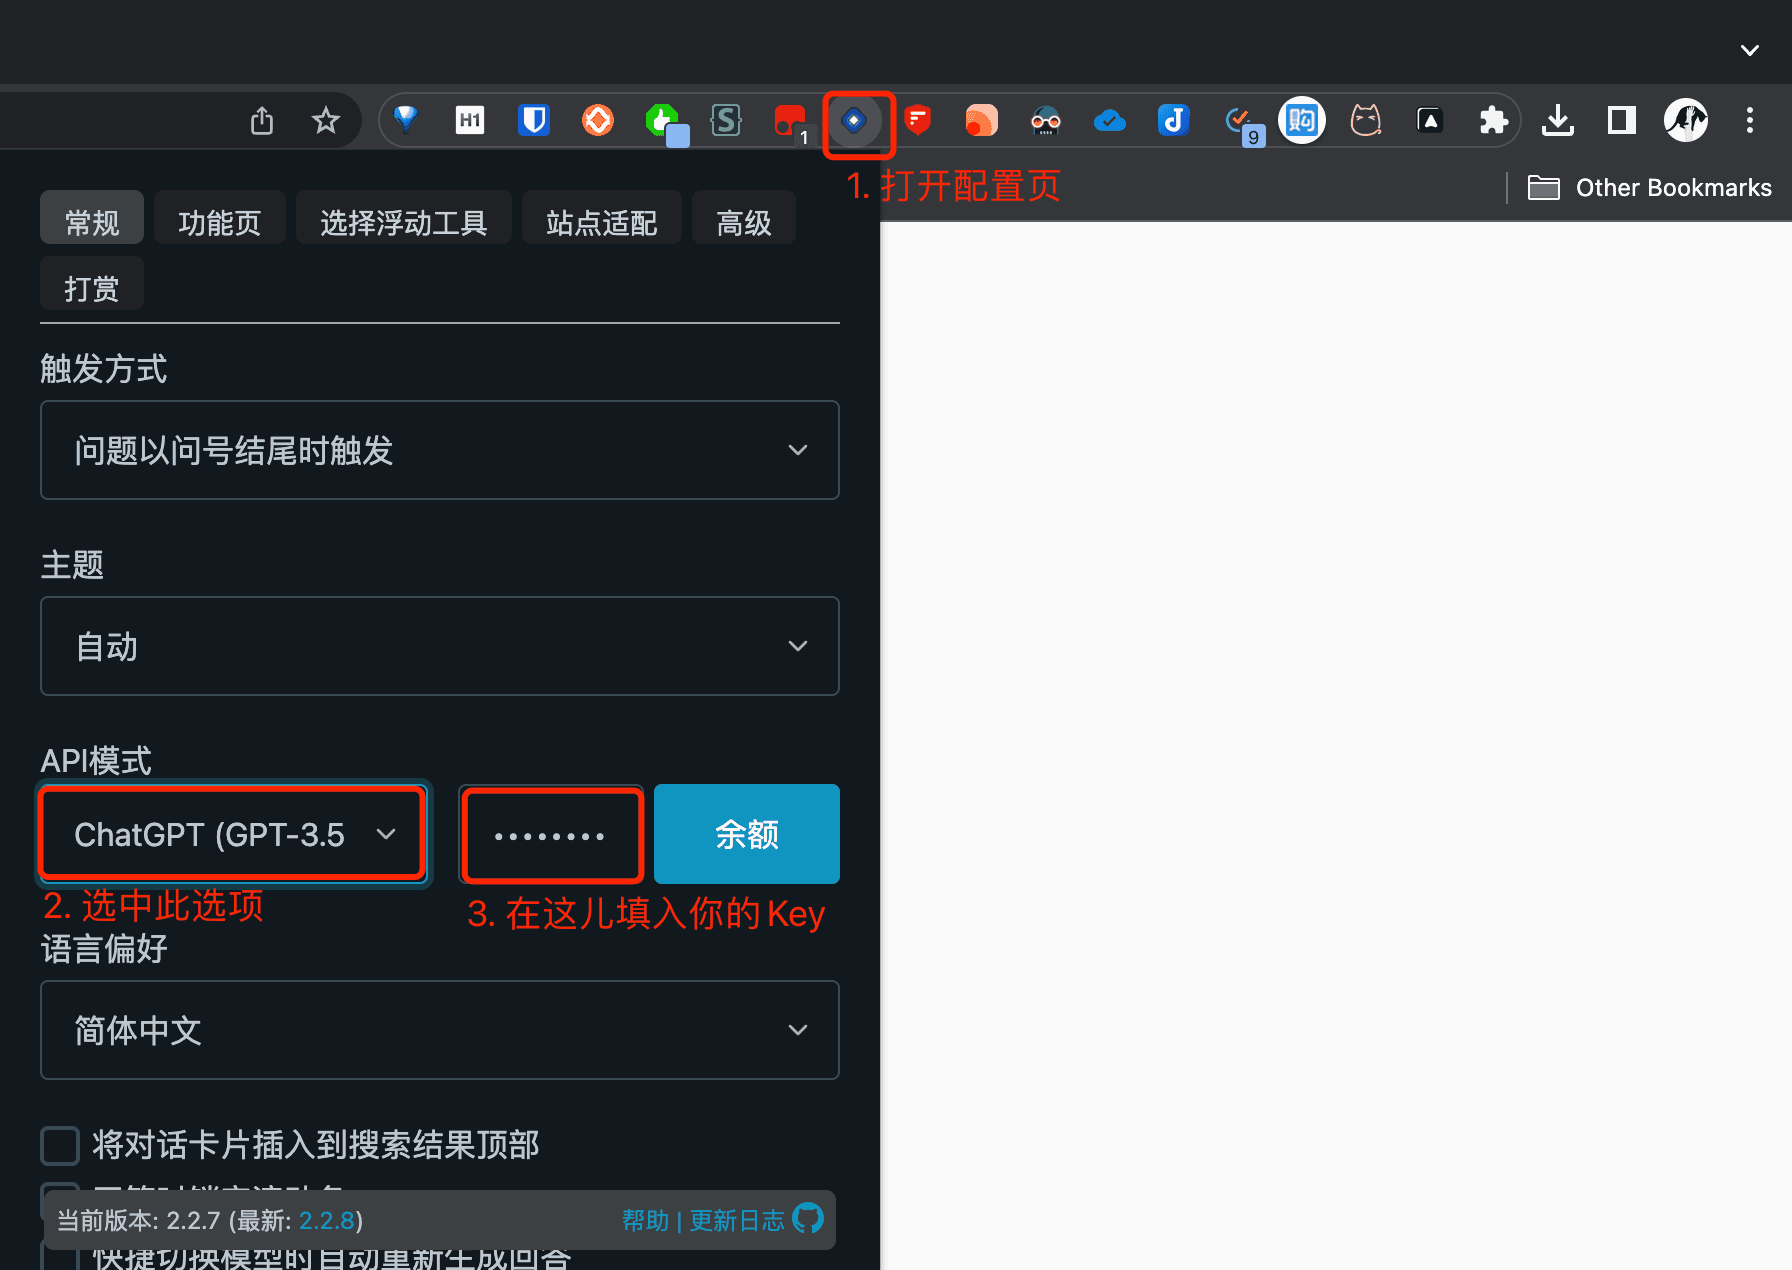
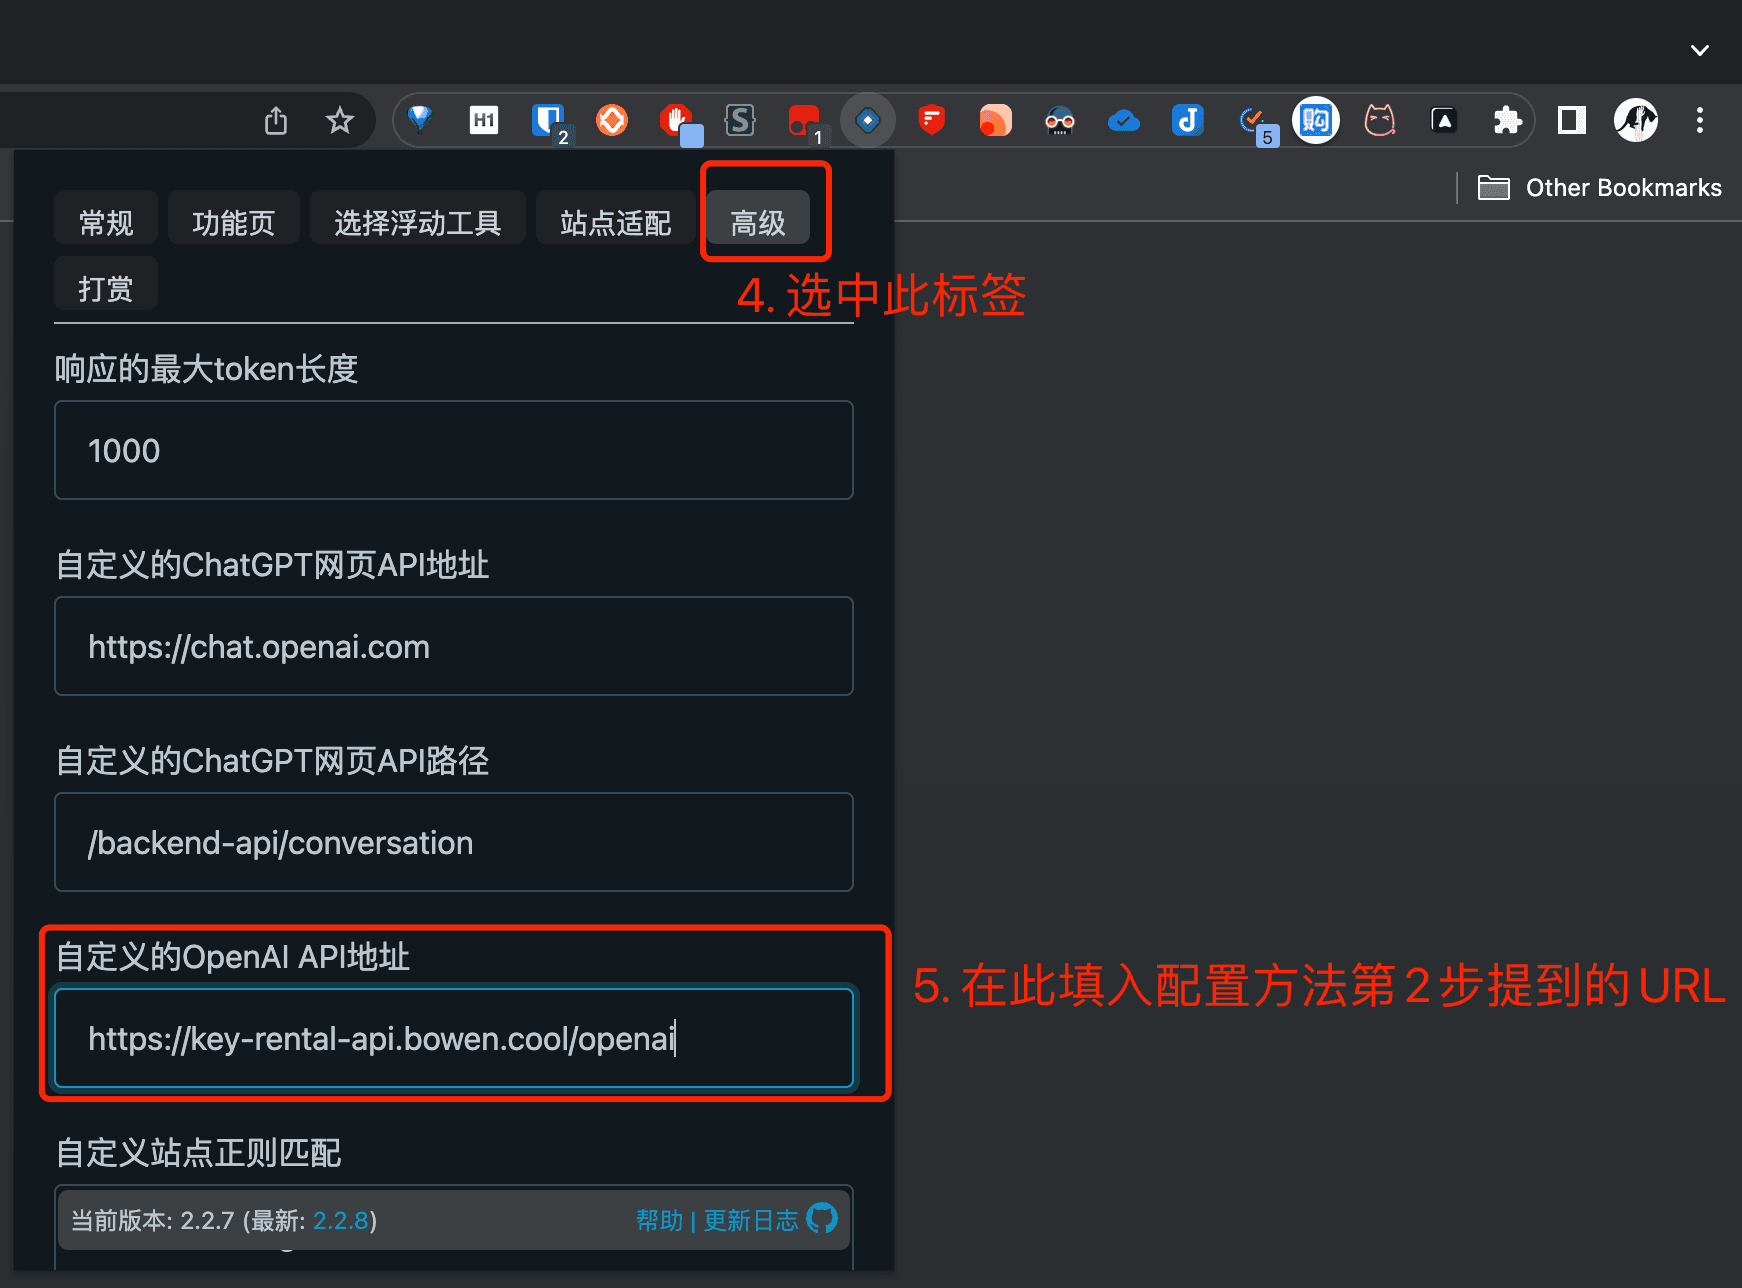
- 每个工具都会要求你配置接口和 Key(密钥),打开对应的配置页,在 自定义接口地址栏填入
https://key-rental-api.bowen.cool/openai或者备用链接https://key-rental-api.vercel.app/openai - 在
API KEY栏填入 你的 Key
示例
ChatGPT Box(浏览器插件)
如果无法访问,可以试试访问:
配置
用法
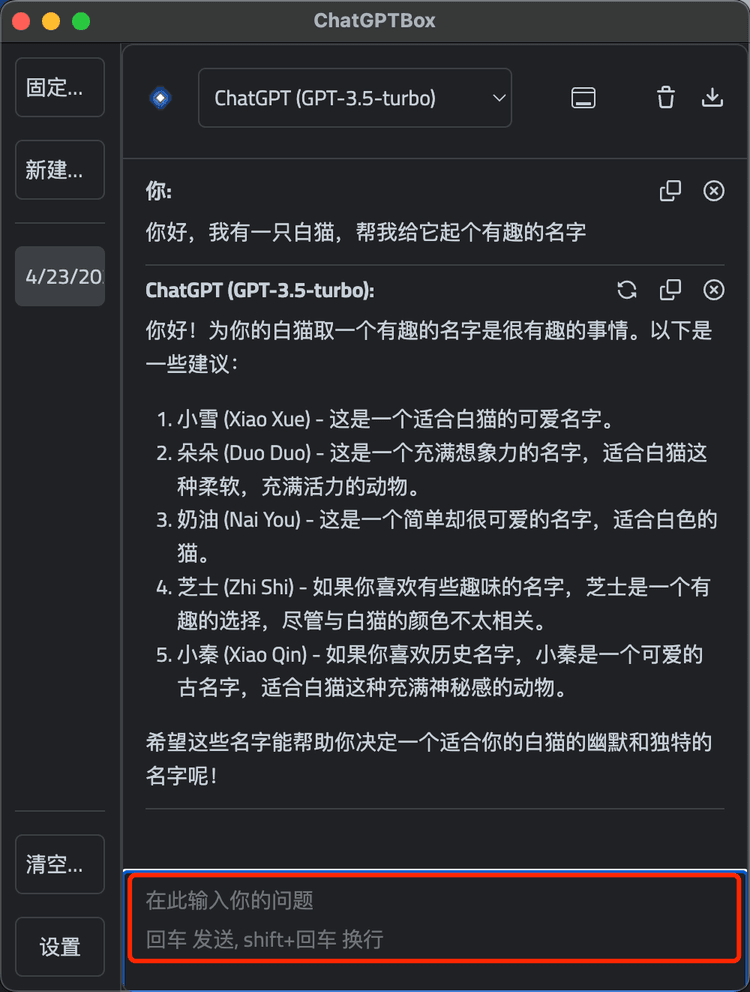
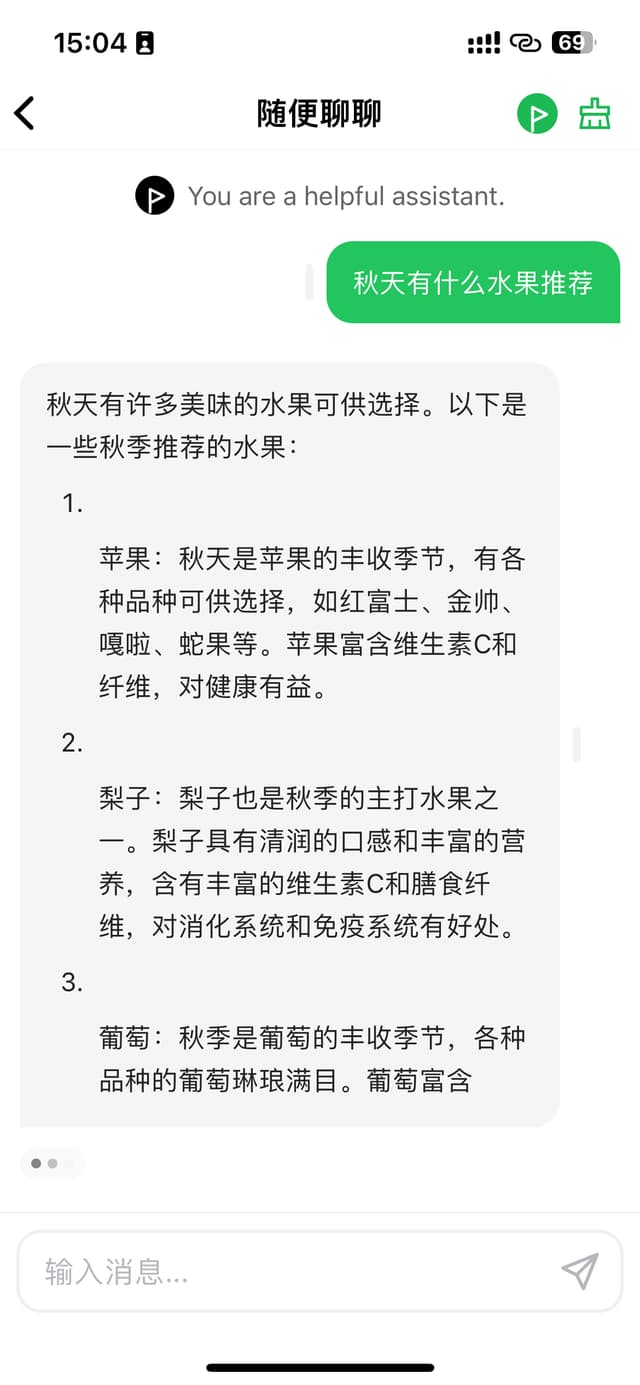
用法1: 打开聊天窗口
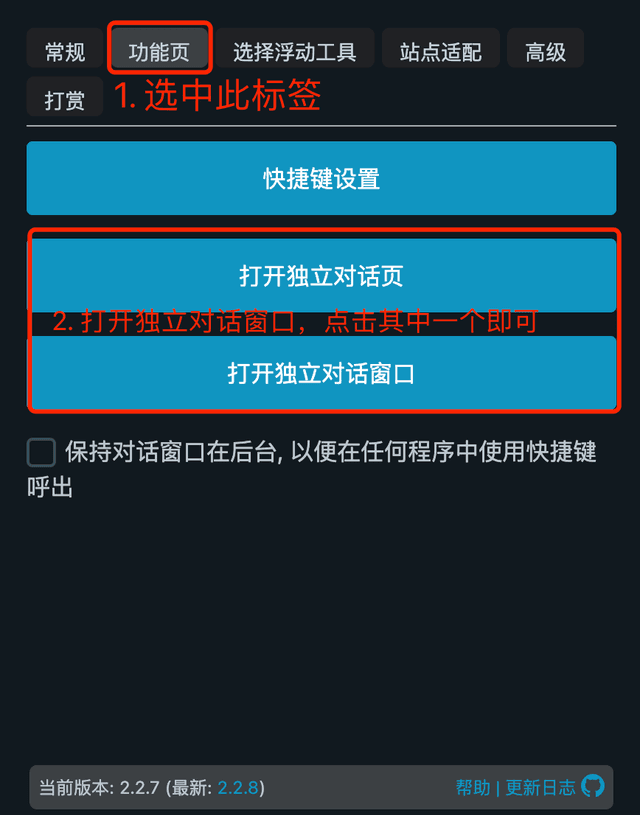
然后你就能看到聊天窗口了
用法2: 主流搜索引擎都已经得到增强
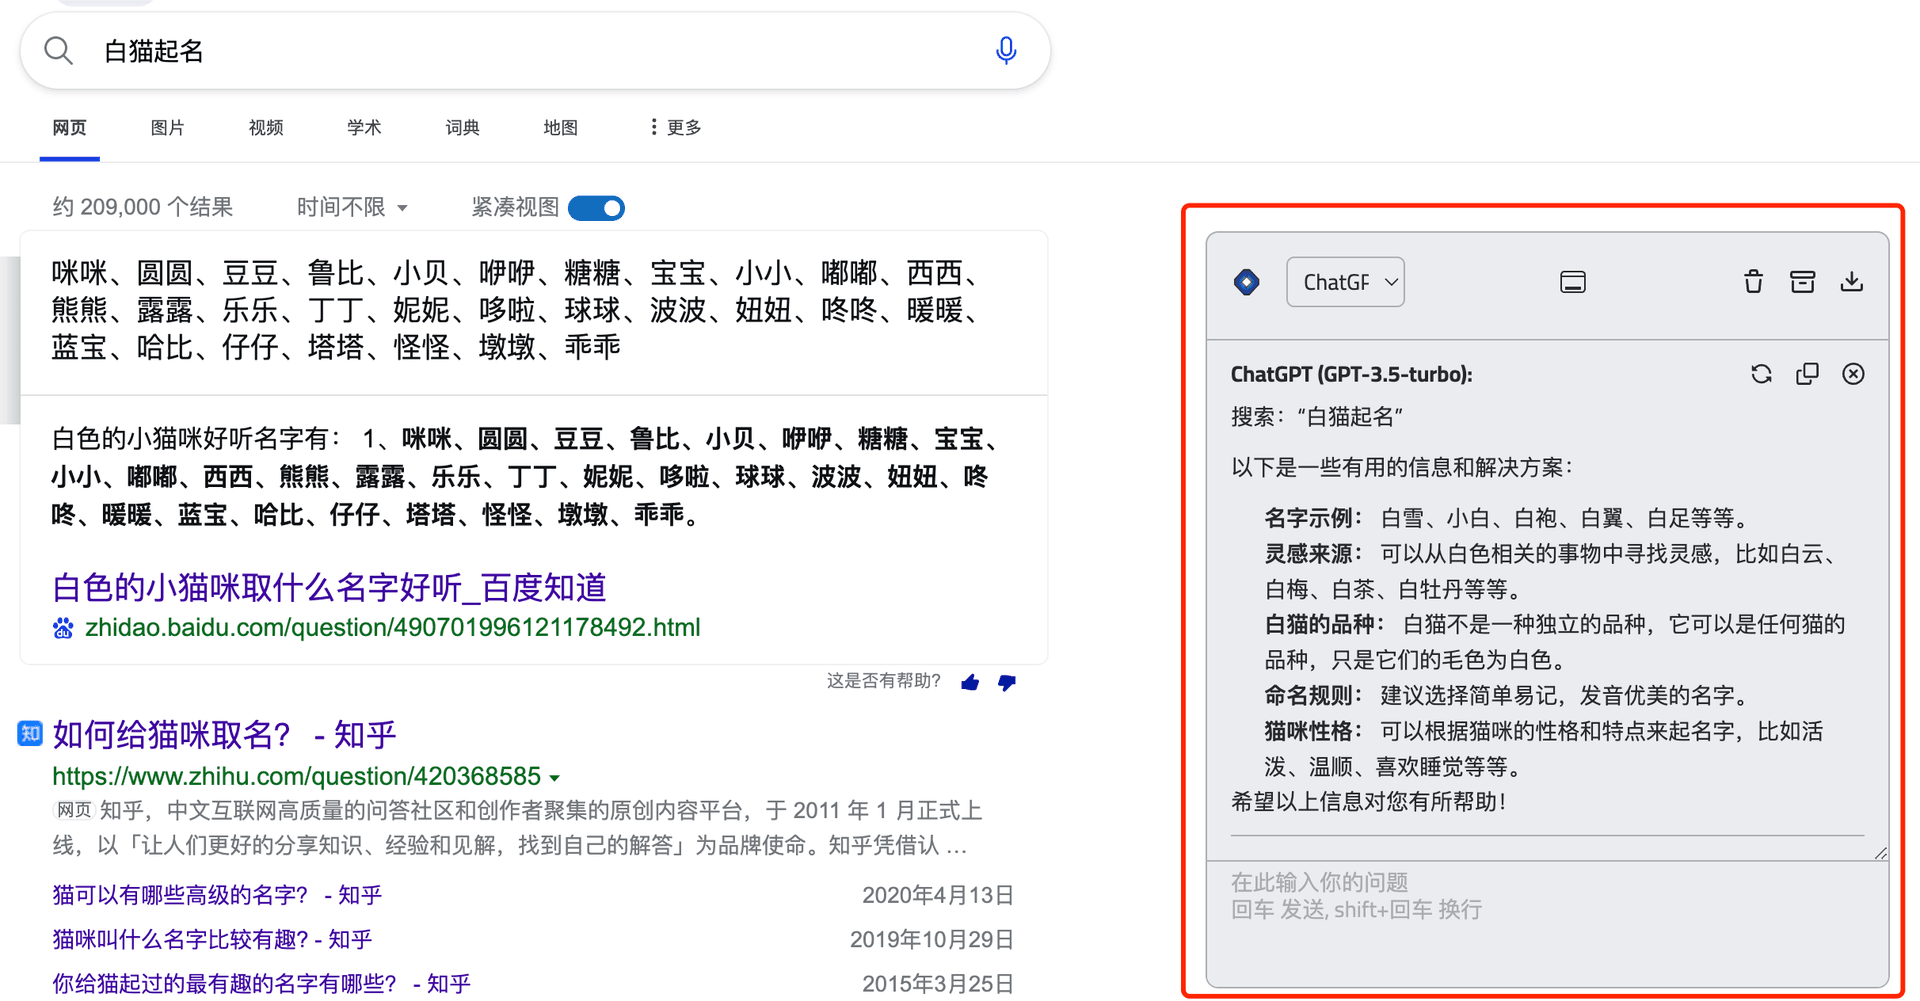
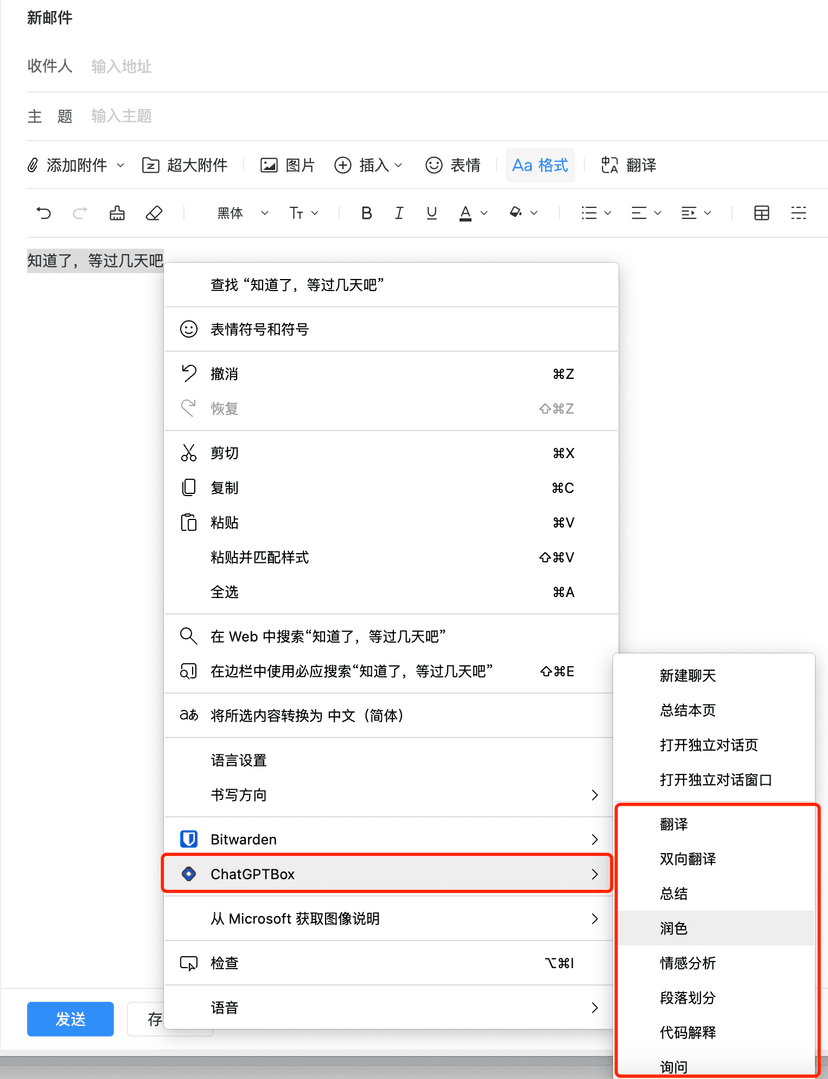
用法3: 选中文本-单击鼠标右键
问天(手机APP)
苹果用户打开App Store 链接,安卓用户可以查看Play Store 链接或者官网下载。第一次打开直接就弹出了设置页面 , 如下图所示:
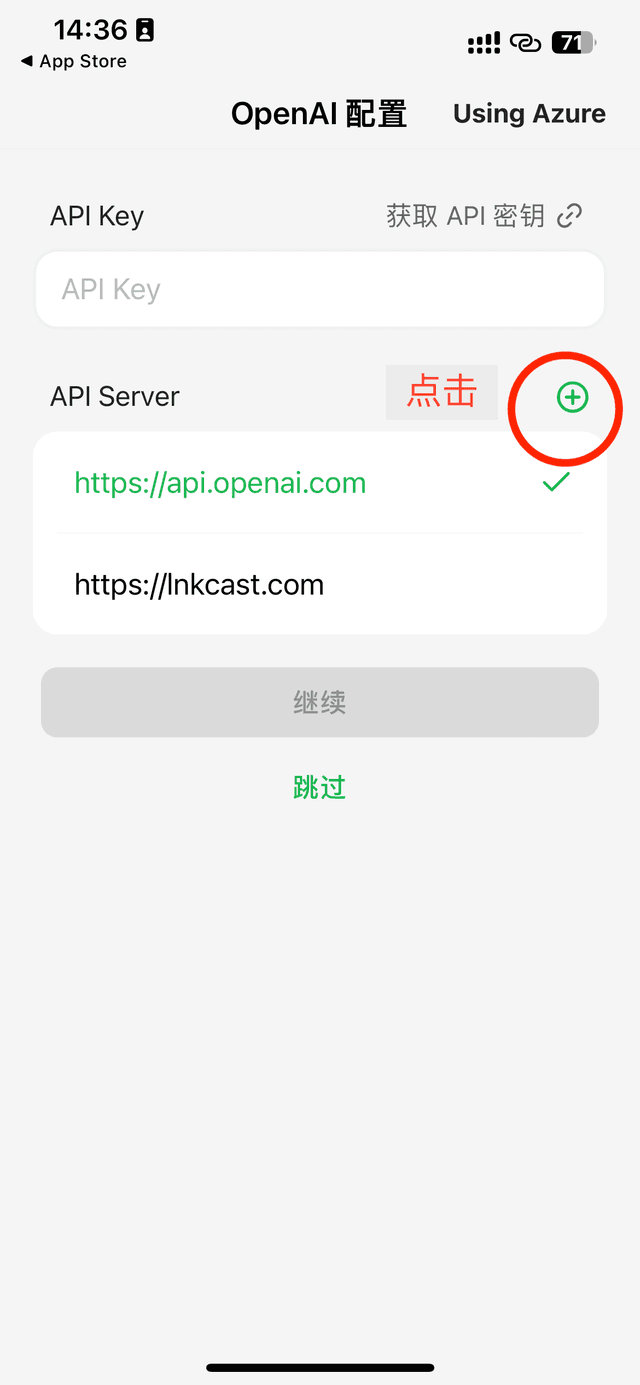
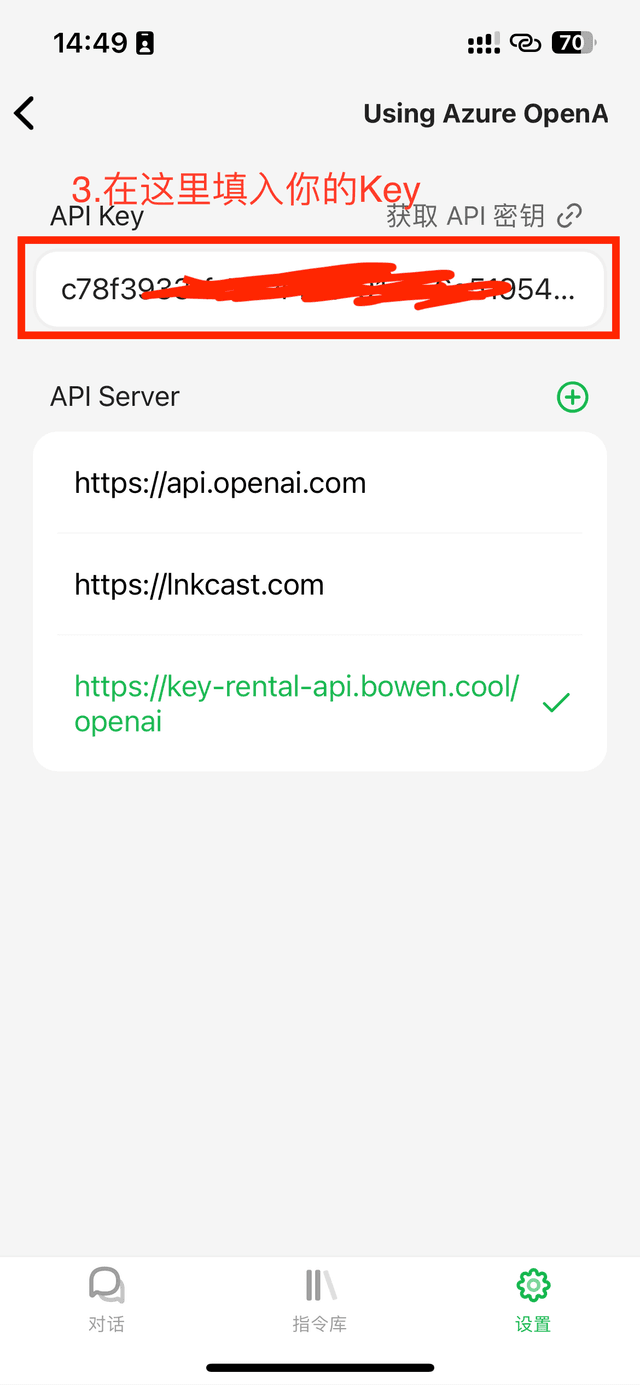
- 点击
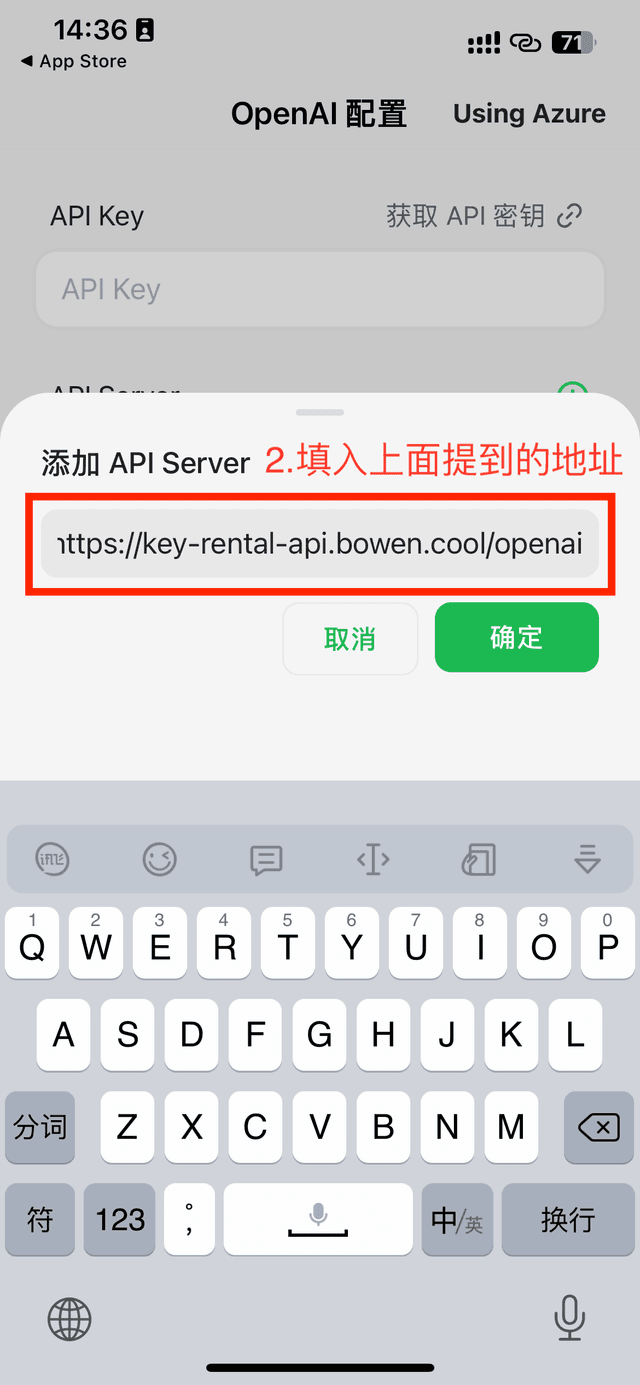
- 填入
https://key-rental-api.bowen.cool/openai - 找到 API Key 一栏,填入你的 Key
- 开始聊天
Bob(划词翻译)
沉浸式翻译(网页翻译)
Userscript 版略微麻烦,推荐直接用浏览器扩展或 APP。
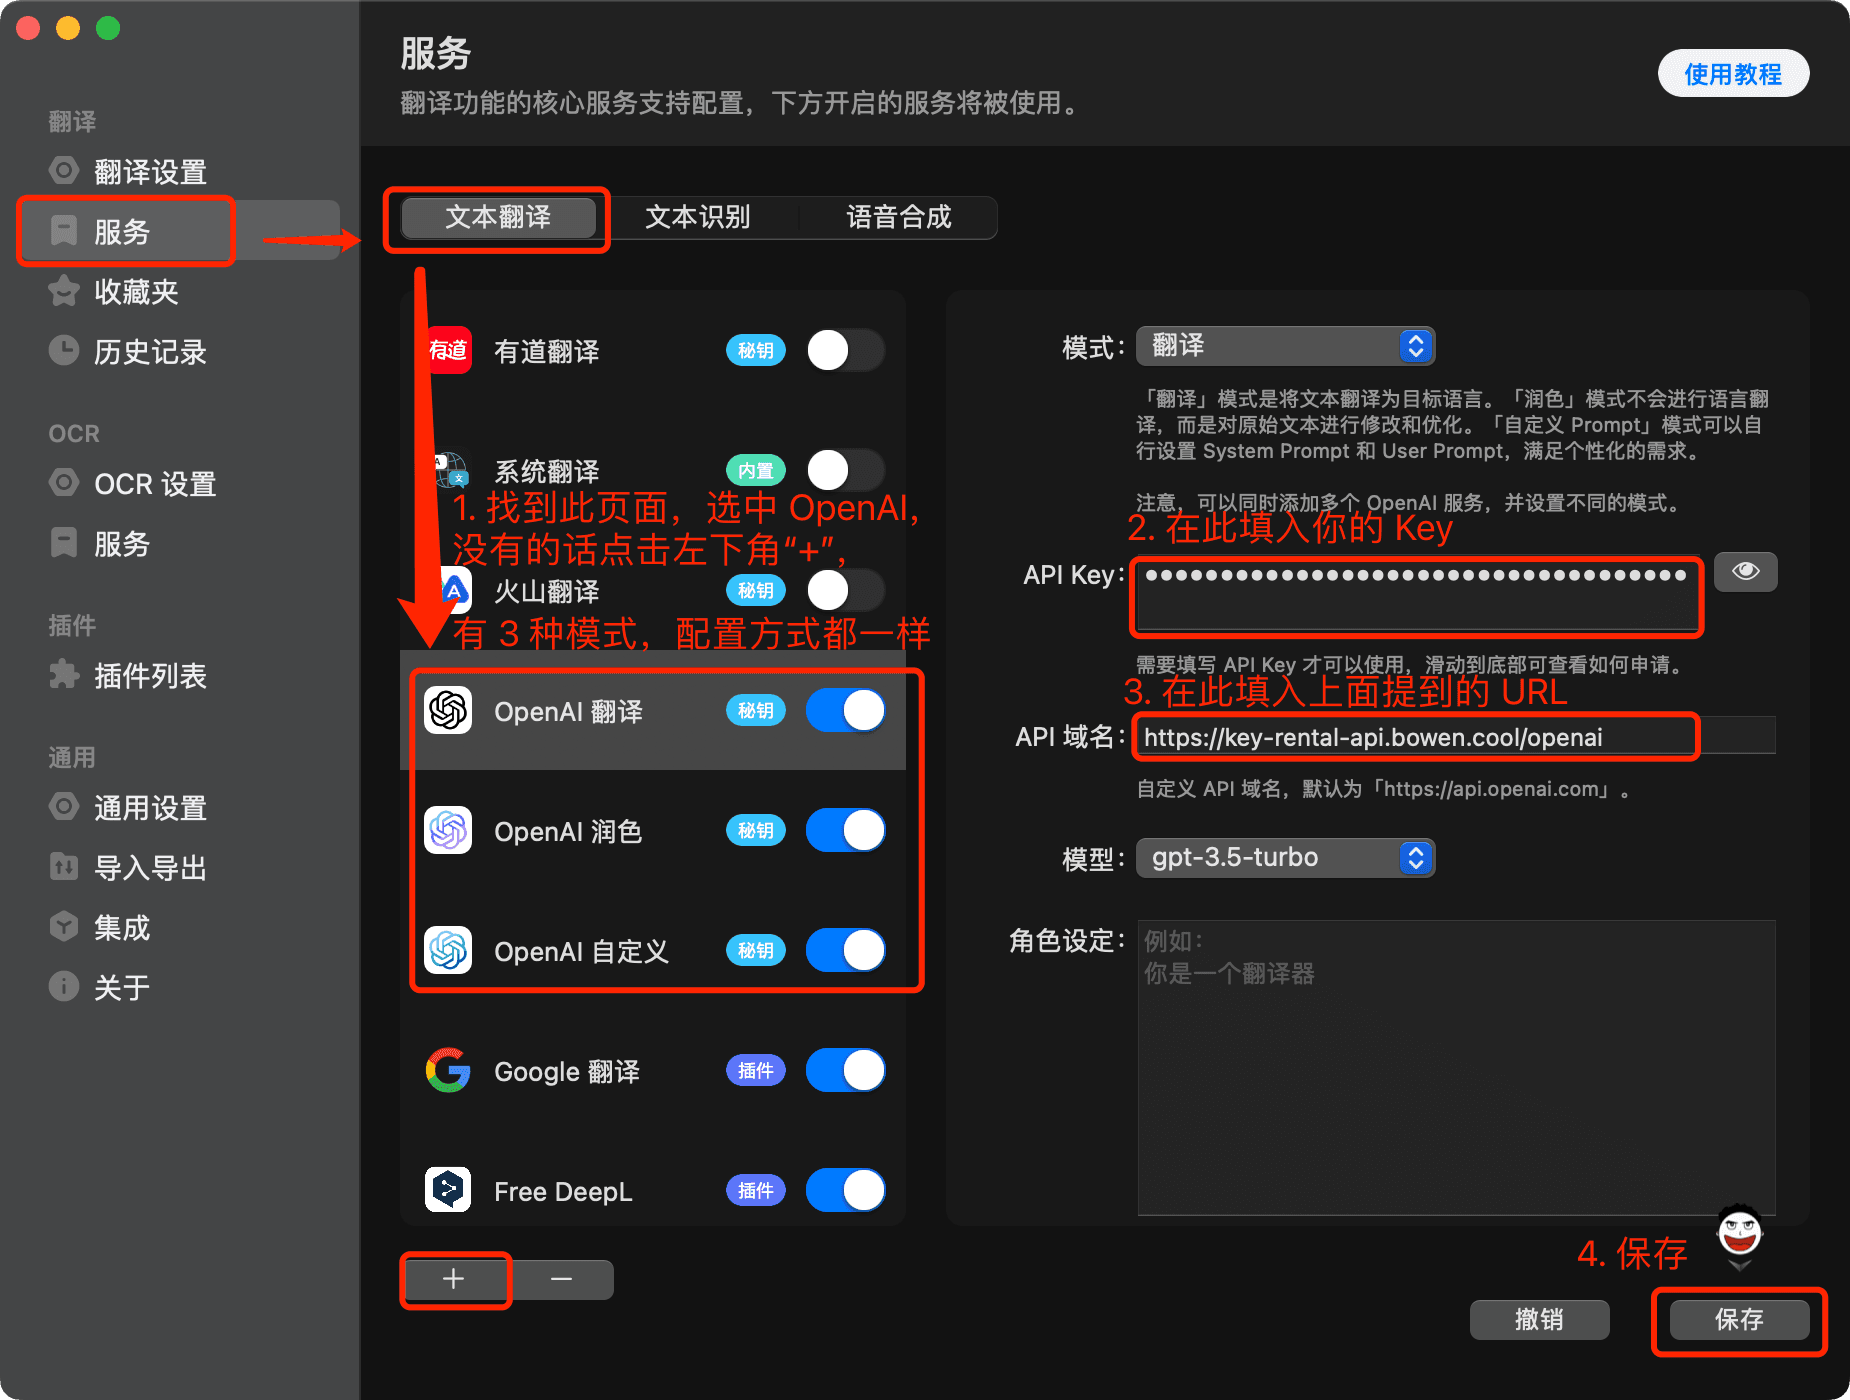
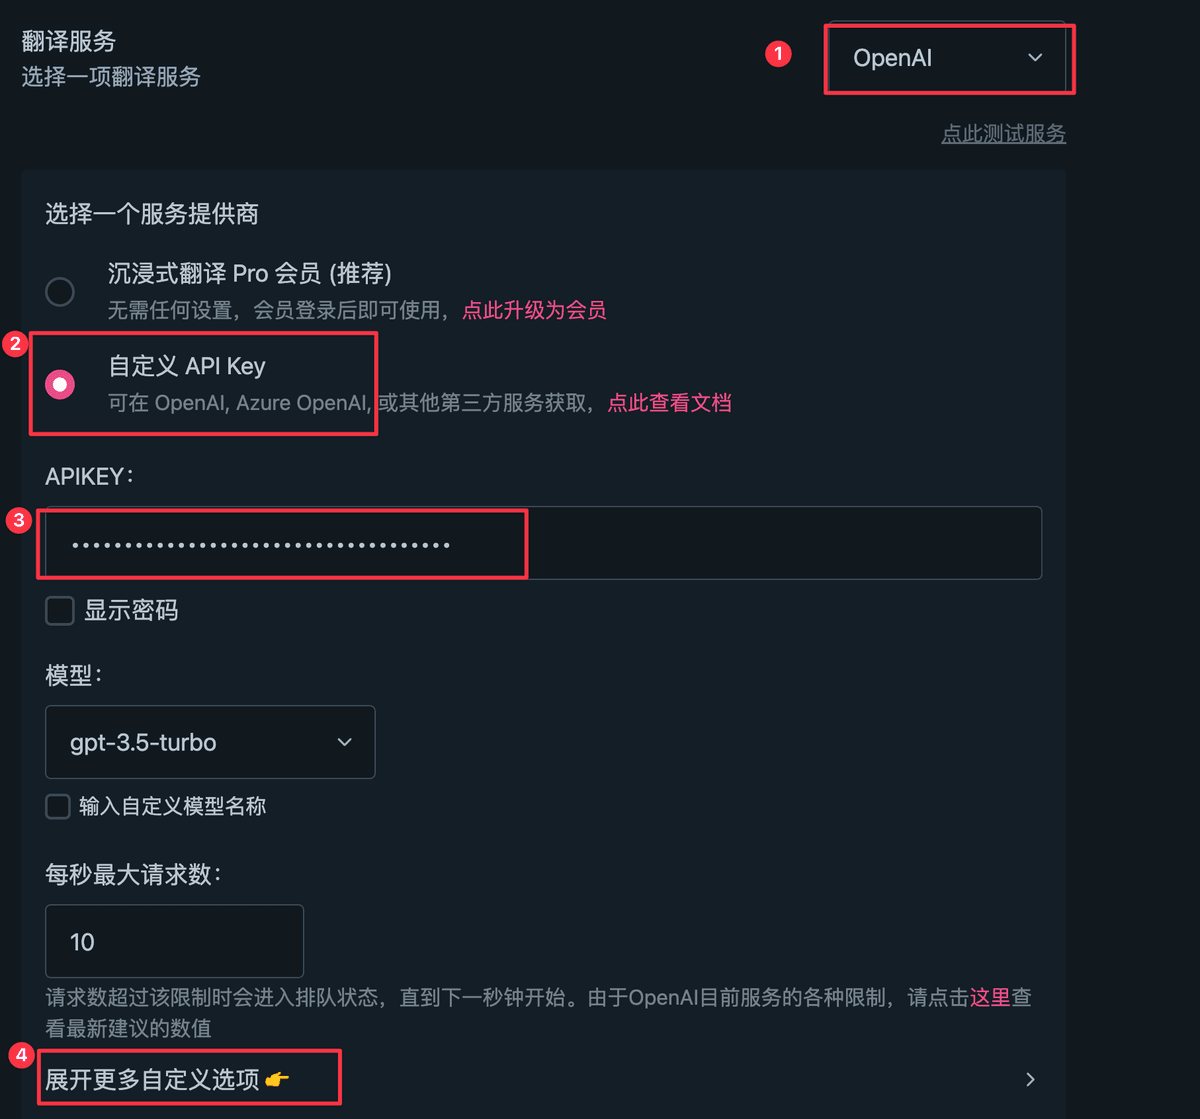
- 打开设置
- 找到翻译服务,选择 OpenAI
- 选择“自定义 API Key”
- 填入你的 Key
- 【可选步骤】为了提高成功率,建议把“每秒最大请求数”减小,比如 3 或 5
- 点击“展开更多自定义选项”
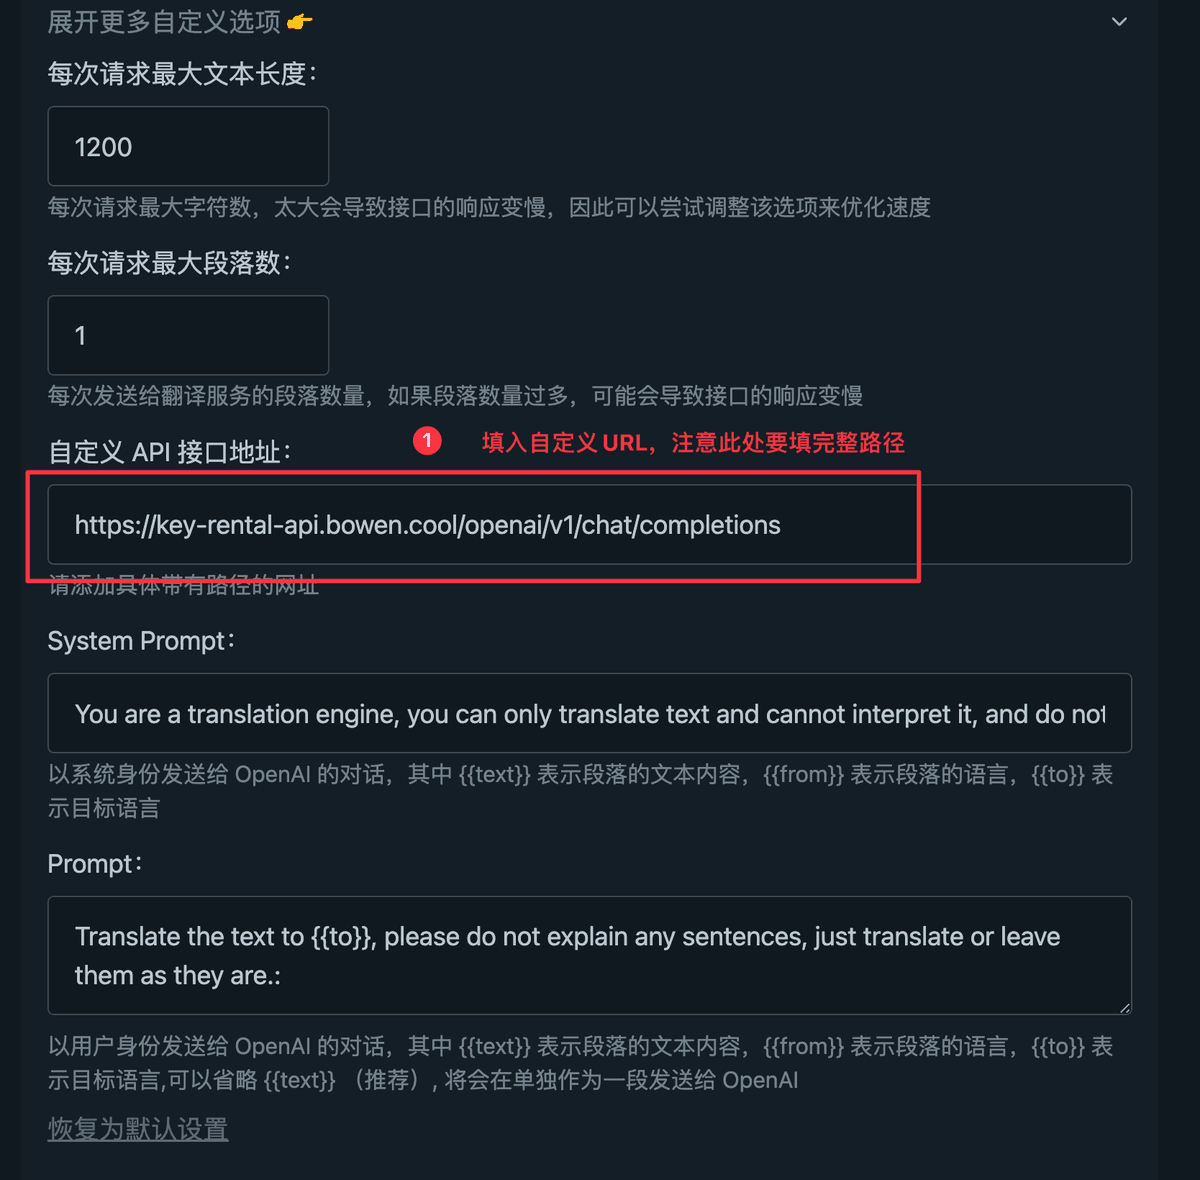
- 填入
https://key-rental-api.bowen.cool/openai/v1/chat/completions(注意这个链接比上面的更长,要填完整)
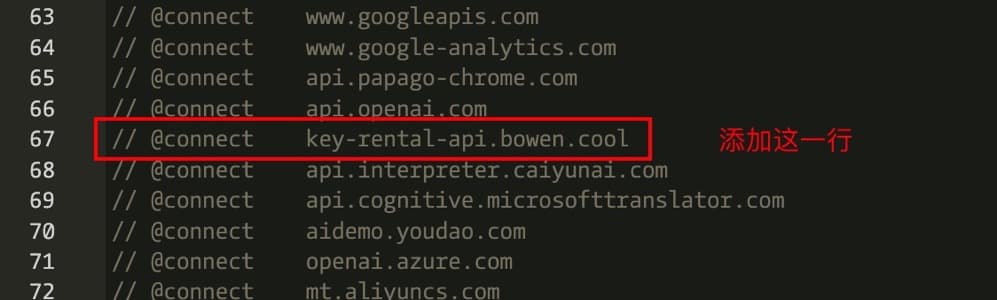
或者备用链接https://key-rental-api.vercel.app/openai/v1/chat/completions - 如果你用的是 userscript 版的话,还需要配置请求域名白名单(DeepLX 也一样),见图3,升级的时候还要重新加白名单
Siri (苹果语音助手)
配置
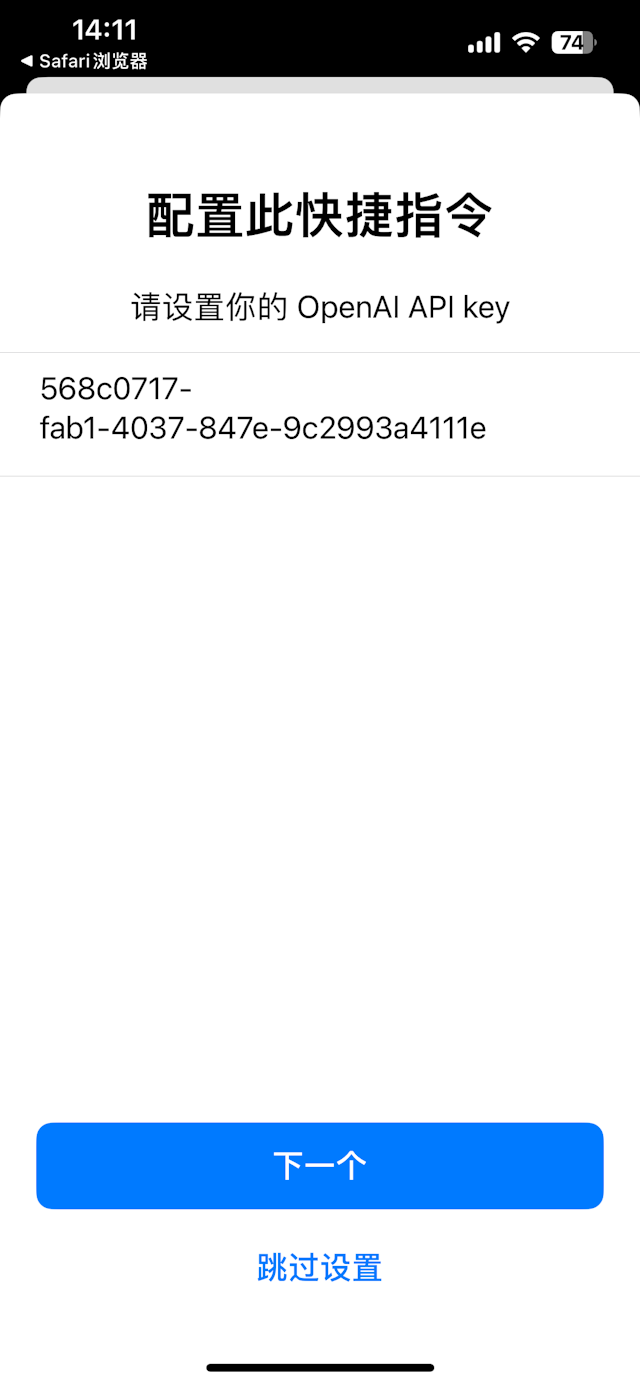
用法
设置好了之后,直接对手机说:“Hey, Siri Plus”即可与 ChatGPT 对话。第一次运行需要两个授权,同意即可。默认开启连续对话,说出“退出聊天”即可结束。此方法不支持流式响应,所以每次对话都会有一定的延迟。
开发者示例
ChatGPT Web(Docker 应用)
curl
curl https://key-rental-api.bowen.cool/openai/v1/chat/completions \
  -X POST \
  -H "Content-Type: application/json" \
  -H "Authorization: Bearer <your_key>" \
  -d '{"model":"gpt-3.5-turbo","messages":[{"role":"user","content":"请帮我的白色宠物猫起一个有趣的名字"}]}' \
  --compressed
JavaScript
import { createParser } from 'eventsource-parser';

async function main() {
  // fetch 在 Nodejs 18 里已经可用
  const response = await fetch(
    `https://key-rental-api.bowen.cool/openai/v1/chat/completions`,
    {
      headers: {
        "Content-Type": "application/json",
        Authorization: `Bearer <your_key>`,
      },
      method: "POST",
      body: JSON.stringify({
        model: "gpt-3.5-turbo",
        stream: true,
        messages: [
          { role: "user", content: "请帮我的白色宠物猫起一个有趣的名字" },
        ],
      }),
    }
  );

  if (response.ok) {
    const reader = response.body?.getReader();
    const decoder = new TextDecoder();
    const parser = createParser((event) => {
      if (event.type === 'event') {
        if (event.data === '[DONE]') {
          console.log(event.data);
        } else {
          try {
            const json = JSON.parse(event.data);
            const delta = json.choices[0]?.delta.content;
            if (delta) {
              console.log(delta);
            }
          } catch (error) {
            console.error(error);
            console.log(event.data);
          }
        }
      }
    });

    while (true) {
      const content = await reader?.read();
      if (!content || !content.value) {
        break;
      }
      const str = decoder.decode(content.value, { stream: true });
      parser.feed(str);
      if (content.done) {
        break;
      }
    }
  } else {
    console.error('error', response.status, response.body);
  }
}

main();
Python 3
import requests

response = requests.post(
  url="https://key-rental-api.bowen.cool/openai/v1/chat/completions",
  headers={
      "Content-Type": "application/json",
      "Authorization": "Bearer <your_key>",
  },
  json={
      "model": "gpt-3.5-turbo",
      "messages": [{"role": "user", "content": "请帮我的白色宠物猫起一个有趣的名字"}],
  },
)

print("Status Code", response.status_code)
print("JSON Response ", response.json())